
It’s time for our youngest chickens to move out of their cramped cage and get to work out in the field. I decided to build a Chicken Tractor. Follow along with me in this post to learn how it all came together!
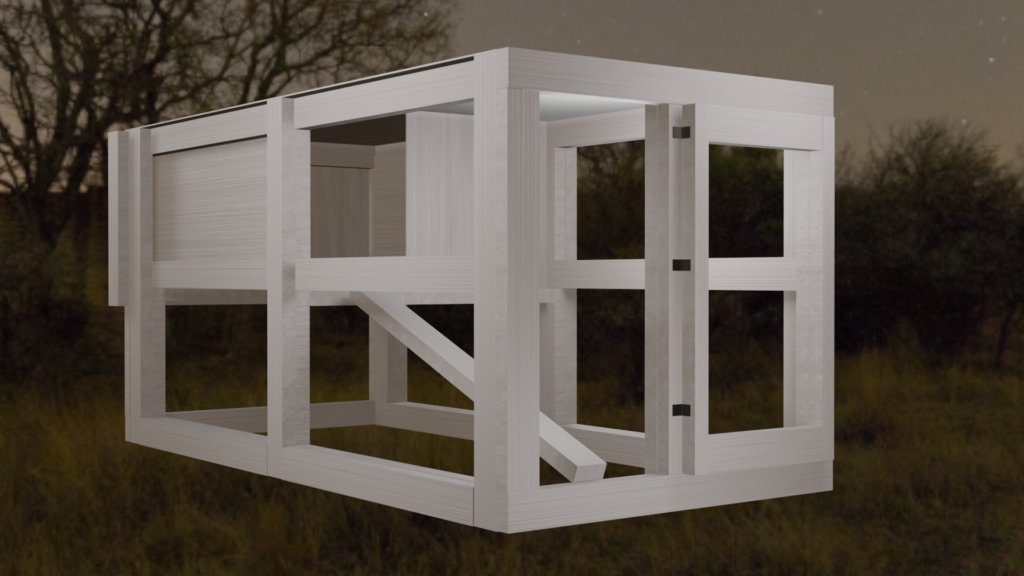
Vision: 3d Model
Because wood ain’t cheap nowadays I decided to hash out some plans in a popular free modelling software called Blender. I was able to set the actual lengths of the lumber to what was available at the store, and came up with 5 different iterations of my design. I ended up with an 8ft x 4ft x 4ft design with a sliding egg door and latched run door. This is what I considered to be the best bang for my buck in terms of lumber.
Parts List
| Item | Qty | Price Per |
|---|---|---|
| 2x4x8 | 27 | $4 |
| 4x4x8 Paneling | 3 | $22 |
| 2x2x8 Furring Strip | 3 | $2 |
| 1/4 Inch Hardware Cloth | 1 | $50 |
| Outdoor Primer | 1 gal | $20 |
| Outdoor Paint | 1 gal | $20 |
| Nails | Big Box | $25 |
| Hinges (2 pack) | 1 | $5 |
| Latch | 1 | $7 |
| Clasp | 1 | $5 |
Getting Started
This post is not meant to be an all inclusive guide, but I will give a rundown on the steps that I took to build this Chicken Tractor.
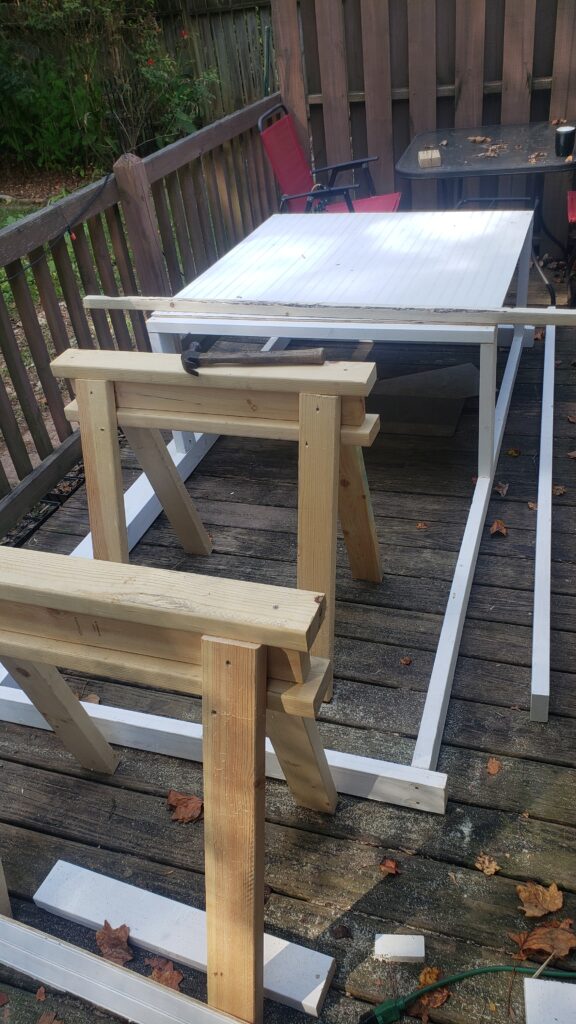
First and Foremost, paint all the boards! Paint the boards with primer now and they will last a lot longer in the weather. This is an easy way to protect your investment!
(timelapse)
Once the Paint is dried it’s time to start building the frame. I struggled to find a place flat enough in the lawn and ended up setting up my foundation on the porch. I made sure to measure the width of the stairs so I could carry it off at some point!
I tacked the base of the frame with two nails per joint. in the future when it’s time to add the hardware cloth, I actually took the first parts of the frame off so I could sandwich the cloth underneath it. It worked well!
Tips
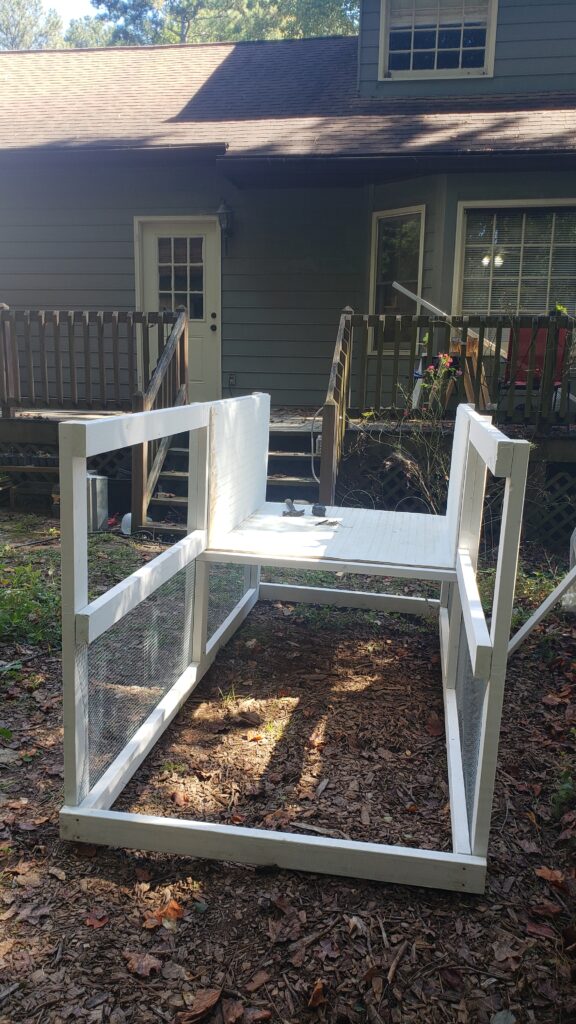
~ Try to reuse material. in my case I was able to salvage some hard ware cloth from scraps my sister had left over from another project.
~ We got a solar powered automatic coop door with a remote, so we can look out our kitchen window and see if we need to manually open or close the door!
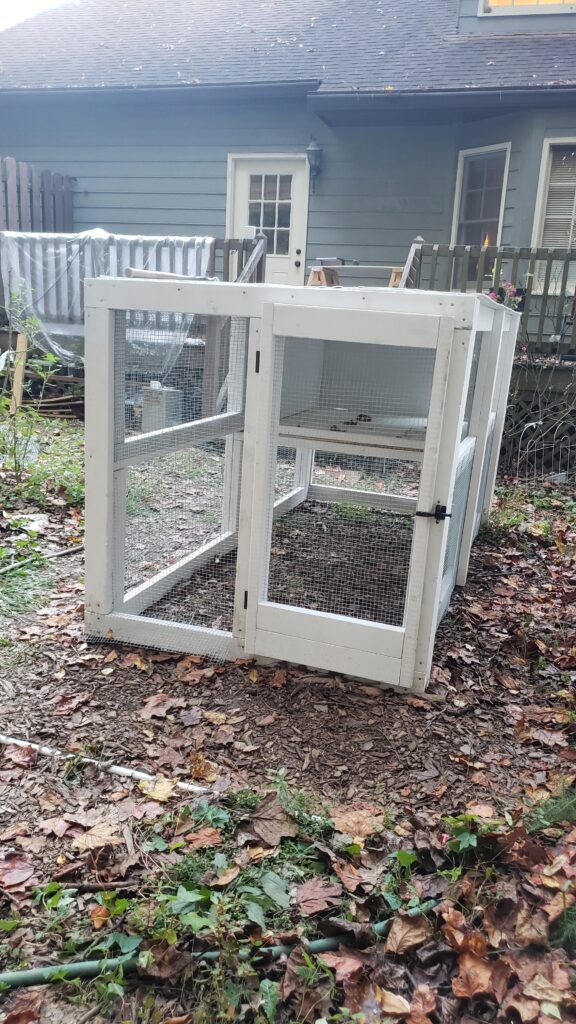
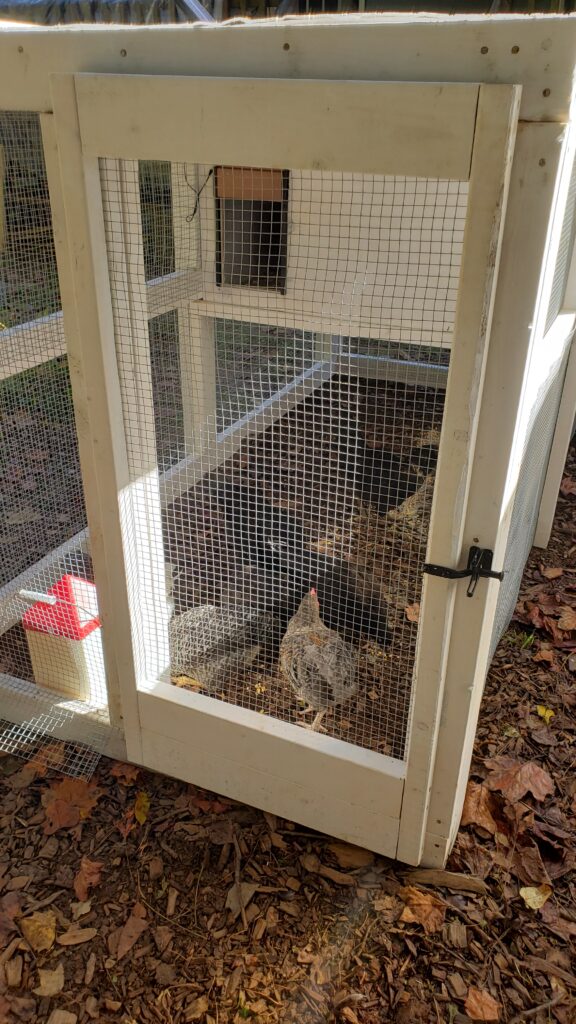
Final Chicken Tractor
Final Thoughts
I enjoy doing DIY projects like these even thought they are somewhat challenging. I spent maybe 16 hours total on this build, really dragging my feet a lot of the time. Even though it was challenging I feel I have increased my construction, 3d modelling, planning, and budgeting skills which is the real value in my eyes. I am more confident in these abilities and I can already think of other projects I can do with my strengthened skills. Stay tuned to read about them!